Netflix gives us video at our fingertips. What if we created video in class as much as we watch it on Netflix? Here’s how. (Netflix logo used under fair use.)
We have had students turn in documents, slide presentations and spreadsheets digitally for a long time.
We’re comfortable with them. They’re easy to open and (fairly) quick to grade … depending on what’s in them, of course!
In the past, video has been a different story, though. Even recently, video was a pain to create — shooting, transferring, editing, uploading, etc.
Simple videos for everyday assignments just weren’t worth the hassle.
Screencasts change all of that.
A screencast — a video that records what’s happening on your computer screen — lets students demonstrate and create visually and with their voice. Plus, many of the tools let you record with your webcam as well, opening up lots of other options.
Screencast videos are often as easy to create as most anything else we do in class.
And they’re as easy to turn in as a document with Google Classroom or a learning management system like Canvas or Schoology.
Netflix is like a library of videos at your fingertips. When students have created screencast videos and they look back through their work, it’s like Netflix for learning! When they have access to each other’s videos as well (on a class website, through a learning management system, etc.), you have a class Netflix-style learning library!
Have your students started demonstrating learning with screencasts yet? If not, let’s get started!
In this post, you’ll see …
- My top three favorite screencast video tools
- 14 ways you can use them in teaching and learning
- 7 tips for effective creation of screencasts
Check out this tutorial video featuring tools, lesson ideas and tips/tricks:
Top screencast tools to use:
There are lots of options out there. These are tools I’ve used extensively during my education career myself.
The one that I think is a classroom essential — if you have Chromebooks or computers with the Google Chrome browser — is Screencastify. You can install it with two clicks. In two clicks, you can be recording video, and it automatically saves to Google Drive — all for free. Hands down, it’s the best for the classroom.
Here are my top three:
1. Screencastify (screencastify.com) — free screen recorder as Google Chrome extension
- Screen recording tool that also records webcam, microphone and system sound
- Runs as an extension for Google Chrome, so you’ll need to use that web browser
- SUPER easy to use
- Save videos to Google Drive or YouTube or as a video file to your device
- Free version: 10 minute limit on videos, 50 videos max per month, Screencastify watermark on videos
- Premium version ($24/user annually per user): No time/video limits, no watermark, crop and trim recording
2. Screencast-O-Matic (screencast-o-matic.com) — free web screen recorder
- Screen recording tool that also records webcam, microphone and system sound
- Download and install their software once, then launch it from their website
- Record and save to Screencast.com or YouTube (paid version saves to Google Drive)
- Free version: 15 minute limit on videos, Screencast-O-Matic watermark
- Paid version ($15/year, $29/3 years per user): No limits, no watermark, upload to Google Drive, etc.
3. Snagit (https://www.techsmith.com/screen-capture.html) — paid screen recorder software
- Program installed on Windows/Mac laptop or desktop computer
- Trim videos, capture screen as image, etc.
- Exports to many places (YouTube, Google Drive, Dropbox, etc.)
- Can save videos as GIF or PNG
How can you use screencast videos in class?
There are TONS of great ways to implement screencasts in class. This list just scratches the surface, and once you try out screencasting, you’ll likely come up with new ways to use them yourself.
If you have other ideas that aren’t on this list, please leave them in a comment at the end of this post!
1. News cast (webcam) — Students become the news anchor and deliver what they’re learning about as the news of the day. Set them up in front of a white board (or green screen!) with a desk and let them summarize the important details.
2. Moving paper manipulatives (webcam) — Have students draw and cut out paper objects that illustrate the concept they’re learning. Point the webcam at the desk (positioning the computer is tricky but doable!). Then have students describe their idea while using those paper manipulatives to illustrate.
3. Moving digital manipulatives (screencast) — Want to avoid all that paper and cutting? Create digital manipulatives instead. Use Google Drawings, Google Slides or PowerPoint. Use text boxes or pictures as items to move around the screen. Then start a screencast video with Screencastify. Explain what’s happening through the microphone and demonstrate by moving those digital manipulatives around the screen.
4. White board explainer video (webcam) — Ever seen those RSA Animate videos where they scribble illustrations furiously on a whiteboard? You or your students can make a version of these videos using Screencastify and YouTube to create great videos that show their understanding or teach content. Here’s what you do:
- Plan out your drawings first.
- Record yourself drawing them on a whiteboard using the webcam.
- Save the video to YouTube.
- Use YouTube Creator Studio (click “My Channel”, then “Video Manager”, then “Edit” for the video you want to edit).
- Under the “Enhancements” tab, choose “4x” from the enhancements to speed the video up.
- Under the “Audio” tab, choose a song to play with the video. (Note: If you want to record a voiceover instead, you’d need to use a video editing tool like WeVideo, Windows Movie Maker or iMovie instead.)
5. Tour Builder walking tour (screencast) — Google has this neat tool that lets you create virtual tours using Google Maps. You choose the locations. You choose the view (satellite view from overhead or Street View from the ground). Then you can display it full screen to show others. This fits perfectly with a Screencastify screencast. Have students set up their tours. Then they can record them, narrating with their microphones and showing all the locations they’ve added to their tours. They’re the virtual tour guides!
6. Sub lesson plans (screencast) — If you’ve ever left lesson plans for substitute teachers, you’ve probably felt the frustration of students not following your instructions specifically as you described them. Make sub plans crystal clear with a screencast video, complete with your voice and video of your screen. Then leave that video in Google Classroom (or on a class website with a link), where students can access it and watch it themselves.
7. Animation (screencast) — One of my favorite non-traditional uses of Google Slides is to create stop-motion animation (flip book animation) by duplicating slides and making slight changes. (See how in this post or watch a great example in this video.) After you’ve created your own animation, record it with a screencast using Screencastify … then bring it into YouTube and use Creator Studio (click “My Channel” then “Video Manager” then “Edit” on your video) to add music to it.
8. Interview (webcam) — Interviewing is a medium that news professionals, talk show hosts, podcasters and more use frequently. People are drawn in to the question and answer format. Students can conduct their own interviews with a laptop/Chromebook and a Screencastify webcam recording. Have them interview each other, teachers, school leaders, family members, veterans on Veteran’s Day, community leaders and more in relation to what they’re learning.
9. Presentations (webcam / screencast) — Oral presentations in front of class are a practice as timeless as education itself. The anxiety over presenting in front of peers goes back that far, too. Recording presentations (with slides or without) using Screencastify provides several benefits:
- That anxiety is eased when there aren’t dozens of eyes watching.
- The presentation can be re-recorded if necessary.
- It helps students watch the amount of time they’re presenting.
- The webcam can record their faces as they speak alongside their slides.
10. Instructional videos (screencast) — In-person, in-class teaching and learning still has tons of advantages. There’s a drawback, though. Once the teacher says it, there’s no rewind button. There’s no pause button. For tricky concepts, recording instructional videos that students can watch later gives them those benefits. Record short videos for your students that they can watch later (or at home with parents when they’re struggling to complete an assignment).
11. Record your class (webcam) — When students are absent from class, they miss a lot. To help them get back on track, you can record class and make it available to them online. Use a Screencastify webcam video to record your instruction. Simply set a laptop or Chromebook up on a stool or desk at the front of the room and start recording. Save the video to your Google Drive and share it with students.
12. Audio assignments (webcam) — So many assignments students do are writing-focused. Change things up by letting them record an assignment with a webcam video. They can be instructed to speak off the cuff, to prepare brief bullet-point notes or to go from a script. This is a great way for foreign language students to practice speaking the new language and demonstrate their skills — by recording a conversation or a monologue in the target language.
13. One question deep dive (webcam / screencast) — Instead of assigning 20 questions or problems for students to work on, what if students only did one — and explained their answer thoroughly? A screencast or a webcam video with a whiteboard lets them dive deep into their thinking and explain their process. Sometimes, when students explain their thinking, it clicks with other students in ways that a teacher explanation does not.
14. Verbal feedback (webcam / screencast) — Written comments from the teacher are quick and easy, and they have their place. Have you considered leaving students oral video feedback? When grading essays, reports or other cumulative projects, teachers can record Screencastify webcam or screencast videos to give more personal feedback. Plus, when they can hear your voice and see your face, those nonverbal and voice intonation clues can show what you really mean when you say “nice job”.
Tips for creating screencasts:
Want to help your students make successful screencasts? I’ve found that screencasting success is equal parts inspiration, planning and execution.
Here are some suggestions to help it all go off without a hitch (or with as few hitches as possible!):
- If you use Screencastify, students can create screencast videos for free and save them directly to Google Drive. Once those videos are in Google Drive, they can be turned in through an assignment on Google Classroom — just as easily as a document!
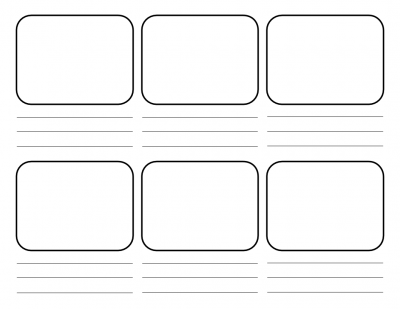
- Have students plan out their videos ahead of time. Storyboarding is one effective way to plan a video. Draw out frames of the story and write out directions or lines to say in a template like the one below …

Click here to make a copy of the Google Drawings file that I used to create that template. (Note: If you use this template, I suggest that you just go ahead and print copies of it and let students write all over them. Drawing out pictures and writing in text digitally on a Google Drawing is honestly more work with less to show for it than it’s worth — in my opinion. In this case, quick pencil sketches get kids on to the work of recording — the real, worthwhile work! — faster.) - Share student videos widely! If students know their work will have an audience bigger than their class (or just their teacher), they’re likely going to be more motivated to do their best work. Create a class YouTube channel or website, or send links to student work out in a class/school newsletter or email to parents/community.
- You don’t need extra tech. The embedded camera and microphone in your computer or Chromebook will probably do. Anymore, the cameras and microphones in devices are so good you don’t need to buy anything else!
- Grade videos faster by watching at 1.5x or 2x. In Google Drive and in YouTube, you can adjust the playback speed of videos. Some videos just need to be observed at normal speed, but with some student videos, you can watch them faster and still get what you need to grade accurately and give meaningful feedback. This saves you time in the end!
- Test it out first. Do a practice screencast — even if it’s just for a few seconds and you’re not actually doing anything! (I can’t begin to describe how many five-second screencast videos I have created.) Make sure the sound and video look the way you want. Then dive in and create your masterpiece.
- Let students learn on a low-stakes assignment first. Never had students create screencasts first? Give them an easy assignment first to get used to the tech. Have them create a short screencast video about themselves, their family, an interest of theirs or an easy topic in your subject.
- If you share videos widely, keep parents and admins in the loop. If you’re going to give students a BIG audience for their work, just make sure that everyone knows what’s happening and that they’re OK with it. A simple release should be signed if the students’ identity is going to be published. Decide how much of it is going to be shared (i.e. initials/first name/first name last initial, faces/no faces, etc.). Don’t opt out of this part just because it seems like a lot of hassle. You’re helping your students create a positive digital footprint and a great digital portfolio for the future!
Ready to get started? Great … your students will thank you!
Get that Netflix-style learning library started and reap the rewards of screencast video!
Note: I haven’t been paid to endorse any of these products in this post. These really are just my favorite screencasting tools and I really use them. In the interest of full disclosure …
My relationship with Screencastify: I’ve written about the product (independently, not at their request), and they send a link to that post to some of their new users. They gave me a premium Screencastify license for free so I could try their paid features. I don’t recommend them because I feel I owe it to them … I really believe their product is what teachers want — easy, powerful and free.
I have no relationship with Screencast-O-Matic. I used it to create screencast tutorials on my YouTube channel years ago.
My relationship with Techsmith, who created Snagit: I’ve done paid and unpaid presentations for them at conferences and they’ve given me licenses to their products for free. I’m under no obligation at this point to recommend their product, but I do so because I use it weekly (at least) / daily (at times) and love all I can create with it.
How do you use screencast videos? What are your favorite tools? Best tips?

Looking for FREE Tech Like A PIRATE resources?
You’ll find a treasure trove of additional ideas and activities related to the book at TechLikeAPirate.com!
For notifications of new Ditch That Textbook content and helpful links:
Are you looking for quality, meaningful professional learning that both equips and inspires teachers?
Matt provides in-person and virtual keynotes, workshops and breakout sessions that equip, inspire and encourage teachers to create change in their classrooms. Teachers leave with loads of resources. They participate. They laugh. They see tech use and teaching in a new light. Click the link below to contact us and learn how you can bring Matt to your school or district!
Is Matt presenting near you soon? Check out his upcoming live events!


